 I'm Finished!!! Thought I'd show what I have been working on for the past several months. Our kid's bathroom was very dated with some seriously ugly wallpaper, and carpet on the floor, which was creeping Fran out...So I proposed to "do it myself". I wanted to redo the walls and lay tile down on the floor.
I'm pretty good with my hands, but there were a couple of obstacles to overcome: One being that I've never done serious work on my home other than painting. The second is that I knew nothing about tiling floors. The third is that I didn't know where I could find the time to work on such a major undertaking. Lastly, long-term, undone projects constantly haunt my thoughts and cause me to lose sleep--I would have to get over that.
When I was in college, I had this absolutely awful physics class--the instructor was unintelligible and insisted on verbally assaulting us with complex formulas without writing them down. It was very traumatic. However, one great example has stuck with me: the Thought Experiment, where circumstances are visualized, leading to a hypothesis and conclusion. I love that idea, versus regular experiments, because there is much less cleanup afteward...
So, I conducted a thought experiment to determine all the different ways I could abuse this room in my house, and what the steps were going to be to accomplish this feat.
I got my biggest inspiration last September, when my brother-in-law Nate came down for a hunting trip. We drove down to the tip of Texas and back in a period of two days, so we had lots of time in the car--Nate and Nicole buy houses, fix them up and sell them, which makes me tired just typing it out. But Nate knows exactly what he is doing, and I managed to coax some tips out of him on how to put the tile down in the bathroom...Just that bit of information, and some things he told me to watch out for, gave me confidence to move forward.
Here were the steps:
1) January 2006: Packed up all the stuff that was in this bathroom--moved it out to the garage
2) Took pictures
 3) Borrowed my dad's crowbar (held onto it for 5 months...sorry, Dad) and ripped out the baseboards and carpet tack strips. I tried to be careful with the baseboards so I could reuse them, but ended up splitting one of them that was firmly nailed into the stud. Then I realized that I was going to have to sand them, repaint them, and figure out where they all went...decided I would just go ahead and get different baseboards.
4) Started taking wallpaper off the walls...The top layer came relatively easily. Turns out the owners of the home had experienced difficulty in deciding the covering for this room...there were three layers of wallpaper--each being uglier than the previous. I had to use several techniques--one of those scoring disks with rotating blades to puncture the paper, then applying a warm solvent to eat the glue off. Worked on this for days and days. Ended up picking 1-inch pieces from the wall--ended up taking to top layer of sheetrock off, exposing a fuzzy cardboard side.
5) My friend, Anon, mentioned that I should use Joint Compound to smooth out the fuzzy cardboard residue--it worked great! Took another week to get the room ready for applying a new wallpaper.
6) Fran make an executive decision that we should consider painting a faux finish instead of putting up wallpaper. I really liked this idea--I think I was mentally locked into the wallpaper idea because that's what we already had on the wall to begin with. Took us a couple of weeks to research this.
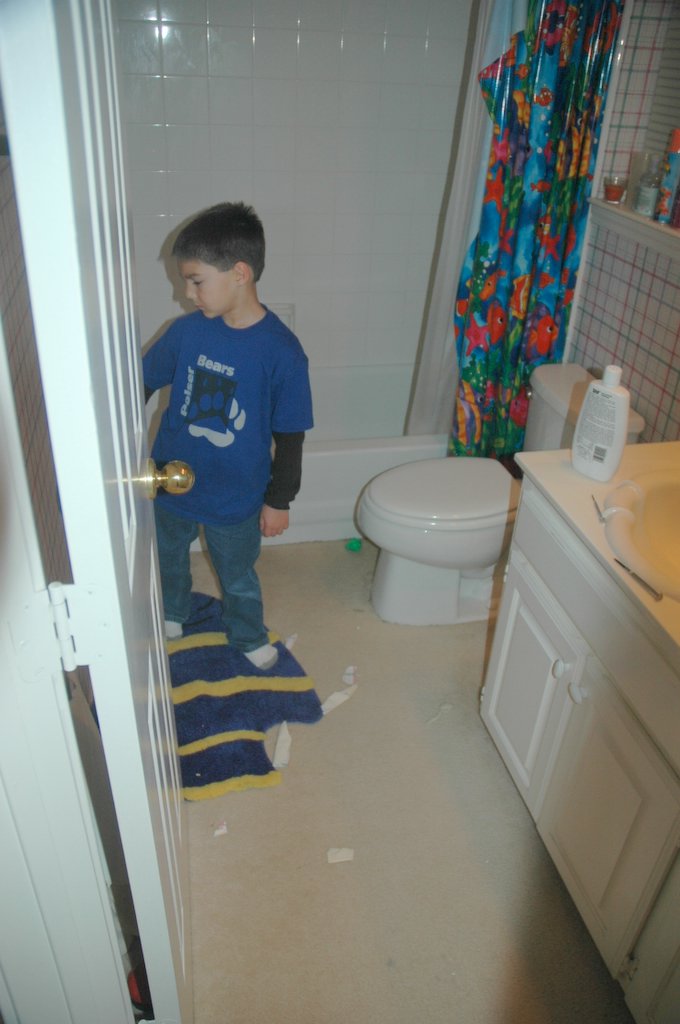
7) During this time, I took the toilet off it's mounting--I knew this would be necessary for tiling, and, since I had no idea how it all worked, I was very nervous about turning any knobs over there. I envisioned the scene from The Shawshank Redemption when poop water comes shooting straight up in his face...It was kind of funny to have the toilet sitting askew in the middle of the room--then I got nervous that one of Ryan's less-gifted friends might be playing at our house and make a tragic mistake...for me to correct. So I taped the lid shut with duct tape.
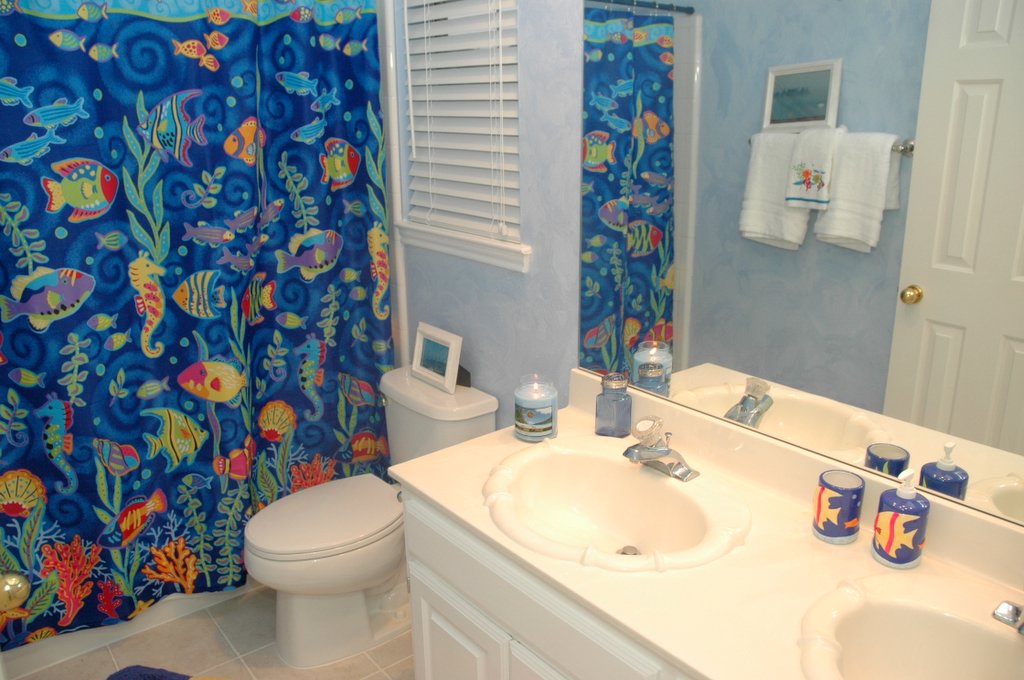
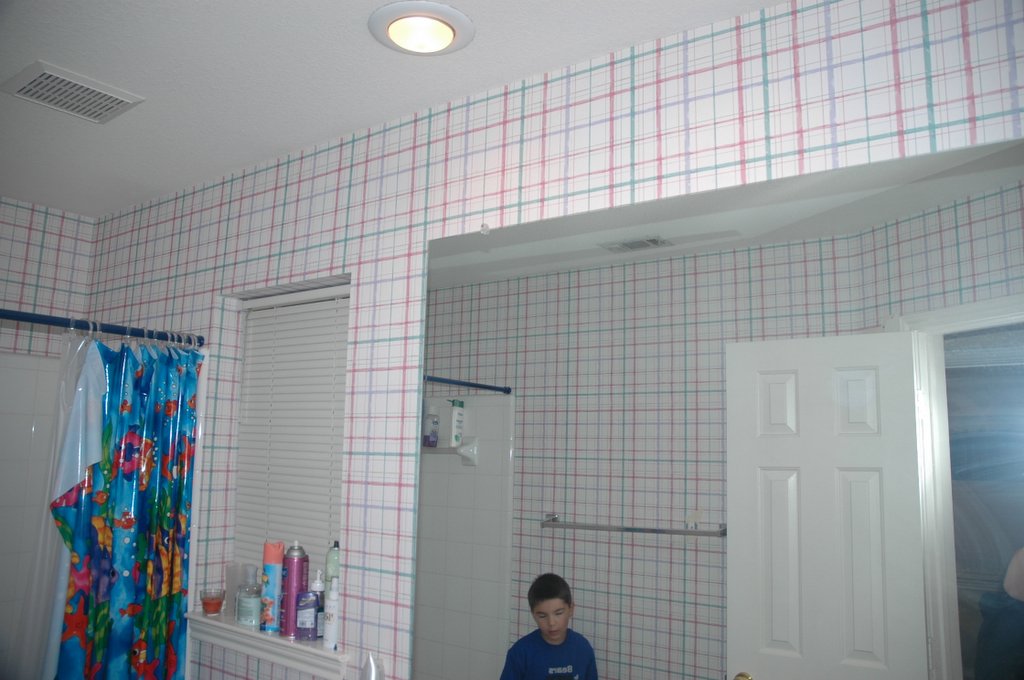
8) Fran decided on a three-color blue glaze faux finish, which would kind of look like clouds. This helped solidify the theme of the room as "The Beach". It would also help dictate the tile we used: we wanted it to look like a white sand beach and have a cool, but never cold, feel under our feet with a little bit of texture, you know, kind of like you are walking on the beach...
9) I printed out the directions to the faux finish technique...three different times. Man, was I nervous...Brother Noel came over after work and helped me move the large wall mirror downstairs. I was resigned to breaking it, but somehow it ended up surviving the whole process.
10) For the first time in my life, I decided to apply primer to something: the walls. I call primer "sucker paint"--you know, only suckers use it. Seriously, why waste the time and money on a flat, ugly layer of paint that you're just going to have to go over again? Why not use the same color and just add to the depth of the overall color? Okay, I learned my lesson. At least I learned it with positive results...
It seems like a theme which can be learned is: Mike, slow your ass down! Realize that going slowly and taking your time will lead to better results.
11) Also realized that the sheetrock/joint compound walls were completely flat: This showed every seam, imperfection, and non-flat area along the wall. The first coat of primer (yep, I used TWO coats of "sucker paint") told me that I had to add texture.
I chose poorly.
A certain brother of mine, whom I'll call "Don", recommended adding texture to the paint mixture rather than spraying on texture and "knocking it down". He's been redoing his whole home, so I felt compelled to take his advice. There is a box of little texture pieces that can be mixed into a primer coat--I picked the medium size. When I was finished, it looked like one of those '70's styles. Fran walked in, gasped, and then started teasing me about how "pimp-like" it looked. She aked me if we were going to hang a disco ball and get shag carpet. She asked me if we were going to get a pink toilet and a lava lamp. I almost cried. I think she actually did cry.
12) Salvaged this whole thing by using a couple of sanding blocks. I went over the walls, sanding them to a much flatter texture which perfect matched the rest of the house (whew!).
13) Painted the faux finish. Actually missed a crucial step and didn't add the $50 glazing compound to the mix, so the first effort was very lackluster: it just looked like I painted the room solid blue. I was a little ticked, because it had taken hours and hours, and I was sweating like crazy, for a relatively boring result. (But what should I expect? It was unlucky step #13?)
 14) Repainted the faux finish, this time using the actual directions in a careful manner. Luckily, I had enough paint to try it again. I used a technique where I painted a layer, another intermediate color on top of it, dots of darker accent color on top, and then using a rag in circular movements to mix the paints together. Turned out nicely. Overheard more than once from Fran's friends "Your Mike did this?"
I walked out dripping in sweat and paint with a brush in one hand and a rag in another. My head was drooping: I felt like River Tam after slaughtering Reavers...
By this time, everything had taken about two months (March). Went a full two weeks without doing anything else.
15) Looking in the room, it was clear that the warm colors of the (damn) cabinets was going to clash with the new, cool colors of the walls. This also dictated that we were going to definitely have to repaint the baseboards anyway. I got bright white trim paint, which seemed like it would be easy enough, yet it fell under scrutiny under the interior design eye of Fran. That skill must reside on the 2nd x-chromosome of all women, along with the ability to find babies cute, tell pretty dishes from ugly dishes, and the need to pull sweater cuffs over their hands when in a cold room...
So I ended up pulling off the cabinet doors, sanding everything down, sanding them again, and again, and again. My friend says that in the trades, they comment that you can cover up any remaining imperfections with "a 1/4 inch coat of paint", which seems to be the strategy employed here.
16) Then it was time to tile. My thought experiment regarding tiling ran around in my head so much that the execution of this seems to be anti-climatic. Luckily, the skills involved increased in complexity, from least to most complex. Not that I knew this until it was all over.
The first thing to do was pull up the grubby carpet that existed. I had left it as a drop cloth during the whole process. It now resembled a Roarschach test of primer, blue paint, grease, and dirt.
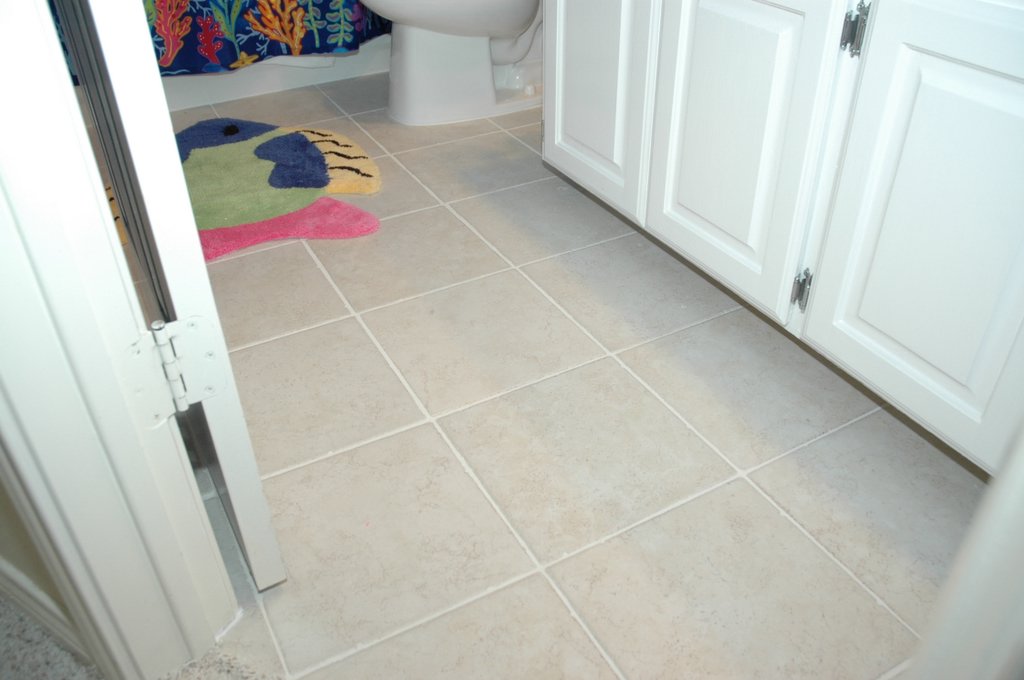
17) I went an extra step and reinforced the plywood along the seams before I laid the Hardibacker board on top. Then I made my measurements and cut the pieces with my new circular saw. Had to get a hardiboard blade for it--the woodcutting blade had started smoking and I could see what looked like hot embers along the cut. The new blade cut like a knife through butter. My measurements were perfect and the pieces were an absolute fit. I refinforced with hardibacker screws--but the tips stuck above the surface slightly. I suppose I could have left them, since the adhesive for the tiles would be deeper than the tips, but it was bugging me, so I pulled up all the screws and countersunk them so the floor would be even.
18) Picking out the tile turned out to be a chore as well. I was utterly humiliated (okay, slightly embarrassed) when the interior design lady at the swanky tile store mocked my idea of using 6-inch tiles. She scoffed, "I haven't seem that design for at least 10 years!". So we used the recommended 12-inch tiles--who am I to argue with a Ph.D in tile-ology?
It also turns out that I have no idea on how to pick out nice-looking tile, or match colors. Despite testing, I'm not sure that I'm not at least somewhat color blind... Fran and I kind of worked off each other's ideas--we went to several stores one day, and I got an idea of what she was looking for. Of course, she took us to premiere shops which were happy to see us because they were trying to zap us for $5 per tile. We were given loaner tiles to take home and examine against our freshly painted walls to see what would look best. Once I saw what she was looking for, I went to Lowe's and found a pallet of sale tiles for $1.80 each--didn't tell her the price until she was already thrilled with them, then bought exactly what we needed.
I also borrowed a tile saw from my brother's friend for a weekend.
19) The actual cutting and laying of the tiles was relatively uneventful, except to say that I threw myself into this project heavily for a week. I ended up being more nervous about what to do with the toilet than anything else. There is a covert world of wax rings, flanges, valves, and ballcocks (hee hee) which sounds more like stuff to make an S&M movie than to attach a toilet to a floor and make it work.
I even surprised myself at how well I had measured and fit the tiles, and even did a great job on some complex pieces which go around door frames and shower tiles. I laid everything out, using plastic spacers to make sure the grout lines were perfectly straight, then pulled everything up so I could lay the tile.
This was the part that Fran was most in doubt about. She checked out five different "How to Lay Tile" books from the library. One of them had a whole house made out of tile--on the walls, the floors, the fireplace, the doors--everything out of tile. Ugh. Fran had also threatened to make me take a class at a local home improvement store. I told her she would have to lobotomize me first.
Again, it was surprisingly uneventful--put the adhesive down with a trowel, raked in an even groove, then laid the tile down using the spacers to make everything lay straight. Used a level to make quick determinations that the floor was ending up level--it was. Let the tile cure sit several days before grouting.
20) The grouting part was also kind of funny. I bought a packet of grout and figured I needed to add water. I had saved this project for a Saturday. So I sat in my chair on the Saturday morning of "Grout-hog day" and realized that there was a whole package of solvents for this fancy grout which I needed to run out and get, which pushed my cost of grout from $3.99 to...$28.75. Here's my question: if you need both packet A and B, why not sell them together? Huh?
Also, I guess grout is now some kind of undiscovered decorator item, because there were all sorts of wacky things you could do with grout. I guess the word "grout" is a marketing nightmare in itself--not only is it by definition wedged in between stuff, but the word sound like something wedged in between dirty toes...So, it's not surprising that they've thought up creative and eye-catching grout ideas, like "glitter grout" and "glow-in-the-dark grout". I passed on the "scratch and sniff grout", though.
This turned out to be nerve-wracking, also. There were extremely explicit instructions which were somehow still difficult to follow. I think they were written by that Physics professor guy from college. Things like: "mix to the consistency of thick toothpaste, but not bread dough"...Huh? YOU guys put this kit together, why don't you just give me the right amount instead of making me go through these subjective judgements? It had four lines of instructions and 15 paragraphs of disclaimers, as if to say: "Hey, buddy, here are the directions...if you screw it up, it's on YOU!"
">
 As I squeezed the grout between the tiles, I realized that I had to work kind of quickly. It was exhausting on just our tiny room--I was amazed at how much detail work it took. As I started working, I felt like my big grout investment was overkill and that I would have a ton left over...as I continued to work, I realized that I was in danger of running out before I was finished. I started freaking out, because if I had to go invest another $30, it would have almost cost more for grout than the tile itself, and I felt that was somehow morally wrong, and definitely inconvenient. I ended up having about a tablespoon of grout left--then there was the curing process--letting it sit, coming back an hour later to smooth out rough spots with a wet towel, then letting it set for 72 hours before doing anything else.
21) There were little touch-ups to do--buoyed with confidence, I actually repaired some of the grout in the shower area. I painted the ceiling and cleaned off all the fixtures. Noel, aka Mirror-Man Extroidinare, came over and helped me re-mount the mirror. He was impressed with the tile job.
22) The cabinet doors were a curse. I had to get special paint-stripping sandpaper and other devices to get the thick paint off the cabinets. Turned out to be tough because of the contours of the framework in the cabinets. I resorted to cursing as I sanded with my detail sander and Dremel tool. Paint had been slopped everywhere, so I thought a couple of coats of bright white finishing paint would cover once I had prepared the surface--it looked like absolute crap. More sanding. More painting. More like crap. These ended up taking hours and hours to get to the finished state that I wanted.
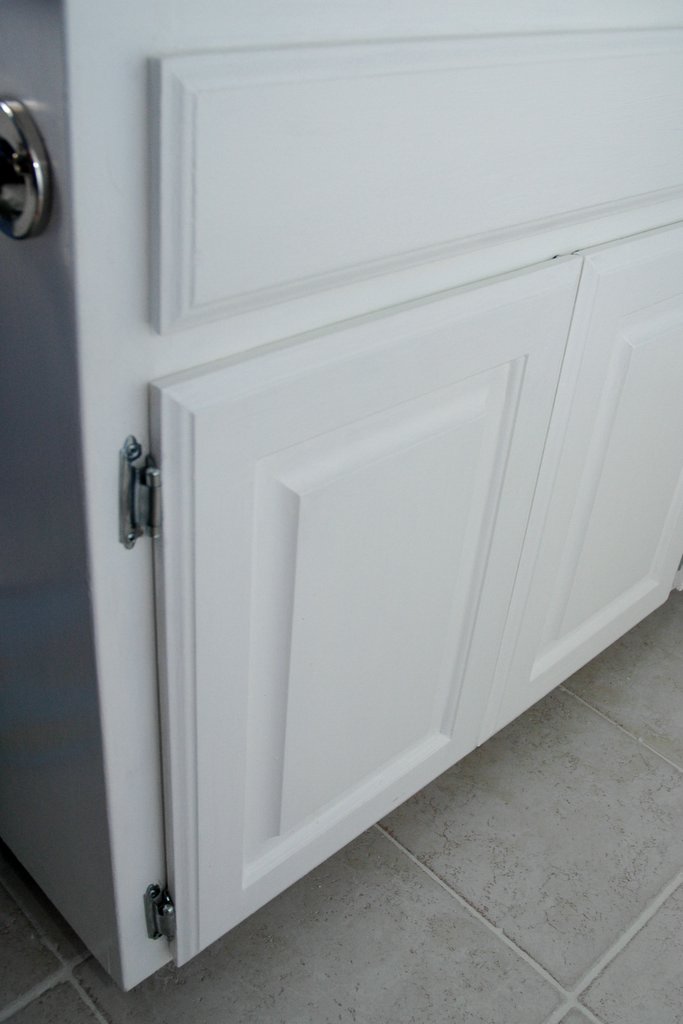
23) Then there was the dumbest issue in the world: hinges for the cabinets. Seems petty, huh? When they were originally installed, the workers just slapped paint over the hinges along with the 1/4 inch of paint on everything in sight. I decided this looked ugly, and determined to replace them. I picked nice silver hinges--I thought I was clever because, rather than worry about hanging the doors straight (Anon warned me this could be tough since I have no clue of what I'm doing), I just found hinges with exactly the same footprint on the door, then I would just screw everything back into the same holes. I should have learned by now that such shortcuts couldn't work out. The doors didn't line up--they looked terrible. Also, the "hinge box" at the store had them all mixed together, so I had carelessly gotten 2 of one style and 2 of another. I picked the style I needed, went back to the store, and got 2 more. Ooops...I got 2 more of the incorrect style. So back I went to get 2 more of the correct style. Put them on and realized that this style of hinge didn't actually hold the door closed tightly--they just rotated loosely. So, when the door was shut, it would bounce back open--maybe wide open, maybe just slightly. Either way, irritating as hell. Had to take all the doors off and remove all the hinges again.
Anyone interested in eight sets of crap silver hinges?
So, I made the decision to reinvest in hinges. I went to the store and got all new silver, spring-loaded hinges which will hold the cabinet doors shut. By now, I had painted and repainted the doors four times each, and the paint covered beautifully. I had even gotten Ryan in on the act in reminiscence of Tom Sawyer inviting his friends to whitewash a fence.
Taking another tip from Anon, I built a prop (okay, I used two sponges) to line the doors up to the correct height. They turned out very nice in the end after all the work.
24) I now needed to cut baseboards for the job. Looking around the house, I realized that I was making over the one room in the house with diagonal wall surfaces--requiring measuring angles and precisely cutting them with a miter saw--another challenge and another tool to somehow borrow with the help of my brother Noel.
I'm realizing that there is a vast underground of guys who have cool tools that they really don't use all that often--maybe they get them for a project and then they sit in the garage. As long as you take care of them, clean them up, and return them promptly, they are pretty much willing to let you borrow them.
That being said, I used to have a manual miter box a few years ago. After wasting 40 linear feet of expensive crown moulding while unsuccessfully trying to cut compound angles for my cathedral ceiling, I sold it in a garage sale. I muttered to myself during that process that life would be so much easier of I was just dealing in two dimensions instead of three--turns out I was right. I made some sample cuts with scrap wood and my angles were perfect (if you google "protractor", there's one you can print out for free and fold it into the angle in your wall--I came up with that idea myself...)! I used a beadboard trim for the baseboard because it reminded me of a beach house where I stayed for a week one time (the time that Gar got seasick). Ryan and I painted it and I went to the "cool tools" blackmarket to borrow a compressor and finishing nail gun (this time from my friend Joe) and attached the baseboards one afternoon.
Used filler putty and touch-up paint on the baseboards.
25) I also learned another secret: caulk. At first, I thought this small room would use about 1/2 a tube of caulk. I ended up using 7 tubes! I went caulk-crazy.
I recaulked the shower, and around the sinks and cabinets. I put caulk down at every step of the flooring--around the plywood, around the hardiboard, the tile itself, and then above and below the baseboards.
I was joking around that, if we ever had a flood, I'm heading for that bathroom, because it's more waterproof than a battleship. I was remembering a water battle that I had with Ryan in that room before, and cringed at how wet the carpet/plywood floor had become--bring on the battle now, though!
26) The last part was the completion of the decor. Fran happily blew the budget on getting new towel rods and a ring for handtowels. I was a little freaked out about putting holes in my freshly faux'ed walls, so I measured about 10 times and checked for level before proceeding. I used toggle bolts and reinforcements to ensure these things were solid enough to withstand the inertia of kid energy ripping towels off the bar. I was very satisfied with this--the previous two towel rods came tumbling down due to poor installation, so again I took my time and over-engineered them.
27) Got a simple 2" white faux wood plantation blind for the window--we had talked about shutters, but could only custom-order them for the window, whereas the blinds were only 18 bucks on sale.
28) Fran picked the shower curtain, and I took some photos of parts of the fish-themed shower curtain, cropped them, and put them into decorative frames which matched the trim--this gave a kid-oriented ocean/fish theme to the bathroom, which we can change when they get a little older. Found the frames on sale for 1/2 price, along with a matching candle and other little items. New towels, cups, toothbrush holders, outlet covers, etc.
Finished this weekend! Whew!
5 comments:
At the risk of sounding like a Valley-Girl.....
AWESOME!!!!!
Very nice job Mike!
Thanks Anon, and thanks for the advice!
...and sorry for the 12-page post. Got in the middle of documenting it this morning and my caffeine kicked in and made me type it all out.
ok...that was a damn long read...but managed to get an hour of my work away...wohoooo....
And man, that was good job, i congratulate you who are not lazy to do house work.
Uh...sorry. I know that was a long post...maybe I should put a disclosure of length at the beginning.
I just got on a roll writing it all out and couldn't stop.
thanks for the nice comments, everyone!
Post a Comment